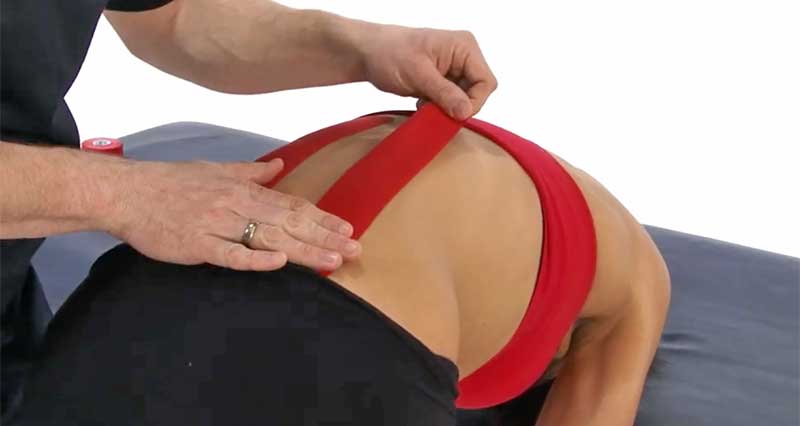
Kinesiology taping is the colourful tape you might see on athletes, sportsmen and women who apply it to muscles and joints for support, to reduce pain, swelling, and improve performance. But does it work? The scientific evidence for the effectiveness of kinesiology tape is mixed and often inconclusive.
While some studies suggest that kinesiology tape provides certain benefits, such as pain relief and improved muscle function, others do not find significant effects. However, it’s important to note the quality of research in this field varies.Here is a summary of some key findings and areas where kinesiology tape has been studied:
Pain relief
Some studies report that kinesiology tape may help reduce pain in various musculoskeletal injuries. For example, muscle strains, patellofemoral pain syndrome (runner’s knee) and shoulder pain. So why does it work? One proposed mechanism is that the tape lifts the skin slightly. As a result, this reduces pressure on pain receptors, therefore increasing blood flow. However, patients report only modest pain relief, and the clinical significance is debatable.
Improve muscle function
Athletes sometimes use Kinesiology tape to support and facilitate muscle function. Some studies suggest that it might help improve muscle activation and therefore, enhance muscle performance in certain situations. In addition, athletes may use it to provide additional support to specific muscle groups.

Lymphatic drainage
Many believe kinesiology taping techniques help with lymphatic drainage and as a result, reduce swelling. However, the supporting evidence supporting is limited. In addition, and the mechanisms by which this happens are not fully understood.
Increase range of motion
Kinesiology tape by design is elastic, therefore, it allows a good range of motion. The aim is to provide support but not restrict movement any more than necessary. Some studies have investigated its impact on joint range of motion, particularly in cases of joint injury or instability. However, results vary, and the effects may be small.
Enhance performance
Athletes sometimes use kinesiology tape with the hope of improving their performance. However, the scientific evidence is limited on its direct impact on athletic performance. But to be fair this is probably very difficult to measure when we are talking about very fine margins of improvement.
Postural correction
Some proponents of kinesiology tape claim it assists with postural correction by providing sensory input to the body. However, again, the scientific support for this application is minimal.
Evidence
Here are a few specific examples of studies on kinesiology taping:
Kinesiology Taping for Patellofemoral Pain Syndrome
Study: A 2016 systematic review and meta-analysis published in the journal “Physical Therapy in Sport.”
Findings: The review examined the use of kinesiology taping in individuals with patellofemoral pain syndrome (PFPS) and found that it may provide short-term pain relief and functional improvement. However, the authors noted that the quality of evidence was generally low, and more high-quality studies were needed.
Kinesiology Taping for Rotator Cuff Tendinopathy
Study: A 2016 randomized controlled trial published in the “Journal of Shoulder and Elbow Surgery.”
Findings: The study investigated the effects of kinesiology taping in patients with rotator cuff tendinopathy. The researchers found that kinesiology tape provided short-term improvements in pain and shoulder function compared to a placebo tape. However, the long-term benefits were not as clear.
Kinesiology Taping for Acute Ankle Sprains
Study: A 2017 study published in the “Journal of Sport Rehabilitation.”
Findings: This study assessed the effects of kinesiology taping on pain and functional outcomes in individuals with acute ankle sprains. The results showed that kinesiology tape provided some immediate pain relief and improved ankle range of motion compared to a placebo tape.
Kinesiology Taping and Muscle Strength
Study: A 2019 systematic review and meta-analysis published in the “Journal of Sports Science & Medicine.”
Findings: This review analyzed the effects of kinesiology taping on muscle strength and power. The findings suggested that kinesiology tape might have a small positive effect on muscle strength and power, particularly in specific muscle groups and under certain conditions. However, the clinical significance of these effects was debated.
For Lower Back Pain
Study: A 2020 randomized controlled trial published in the “Journal of Clinical Medicine.”
Findings: This study investigated the use of kinesiology taping in individuals with chronic lower back pain. The researchers found that kinesiology tape, when combined with exercise, provided significant improvements in pain intensity, disability, and quality of life. This was when compared to exercise alone.
Conclusion
It’s important to approach the use of kinesiology tape with a degree of caution and skepticism. While some individuals report positive outcomes and benefits, the placebo effect (where people feel better because they believe the treatment is working) can play a role in these perceptions. But the end of the day it is down to individual choice and experience. If you feel it helps you then great! Do what works.
If you’re considering using kinesiology tape for a specific condition or injury, we recommend consulting your healthcare provider or a physical therapist. They can advise you on whether kinesiology taping is an appropriate for you and apply it correctly. Additionally, do not use kinesiology tape as a sole or primary treatment for serious medical conditions or injuries. Use it to complement other evidence-based therapies.
More high-quality studies are needed to draw definitive conclusions.