Wrist taping (or strapping) helps support the joint during recovery and can reduce the risk of further injury. Below we explain when to use taping, how it works, and simple techniques you can apply yourself.
If you suspect a fracture or severe injury, seek medical advice before taping. Do not apply tape if you have circulation issues or a known allergy to adhesives (many tapes contain latex).
Introduction to wrist taping
The exact taping technique depends on your injury. Understanding how the injury occurred helps identify which movements need restricting. The goal of taping is to support injured tissues by limiting movements that place stress on ligaments or tendons.
For example, if your wrist has been forced backwards (extension injury), taping should restrict that movement while allowing safe motion in other directions. Taping is applied using:
- Anchor strips – placed directly on the skin (or underwrap if needed)
- Support strips – applied between anchors to control movement
How to tape the wrist to prevent extension
This technique is used to limit wrist extension after an injury caused by the wrist bending too far backwards.
- Apply an anchor strip around the wrist, and another around the hand (just below the knuckles).
- With the wrist held slightly in flexion, apply support strips from the hand anchor to the wrist anchor. Cross the strips over the middle of the wrist to reinforce the support.
- Continue applying strips until the wrist is fully supported, making sure all areas are covered.
- Finish by securing everything with additional anchor strips around the wrist and hand.
- Check the taping by gently trying to move the wrist into extension. Movement should be restricted but not painful or tight enough to affect circulation.
- For extra support, you can apply an elastic adhesive bandage over the top.
How to tape to prevent wrist flexion
This technique is used to limit wrist flexion after an injury caused by the wrist bending too far forwards.
- Apply an anchor strip around the wrist, and another around the hand (just below the knuckles).
- With the wrist held slightly in extension, apply support strips across the back (dorsum) of the wrist, running from the hand anchor to the wrist anchor. Cross the strips over the middle of the wrist to reinforce the support.
- Continue applying strips until the wrist is fully supported, ensuring all areas are covered.
- Finish by securing everything with additional anchor strips around the wrist and hand.
- Check the taping by gently trying to move the wrist into flexion. Movement should be restricted but not tight enough to affect circulation.
- For extra support, apply an elastic adhesive bandage over the top.
Quick wrist taping
This wrist-taping technique is for general wrist pain or if you have a sprained wrist. It is quick and simple to apply.
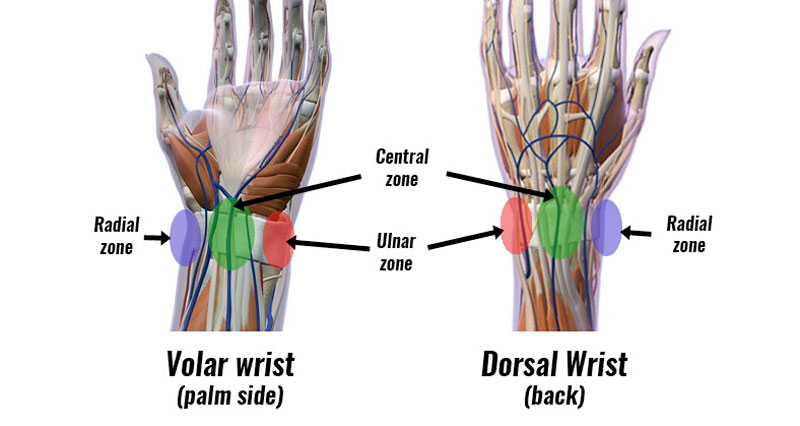
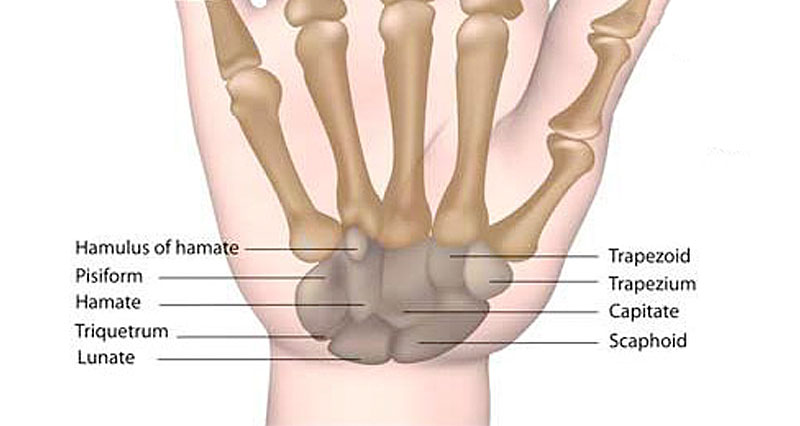
- Find the middle of your wrist. You have bony parts or protrusions on the outside with a softer ‘fleshy’ part in between.
- Apply a strip of 2.5cm zinc oxide tape around the middle of your wrist.
- Apply a little tension, but it is important not to make it too tight because you will restrict blood flow. If your hand appears swollen, goes blue, or you feel numbness, pins and needles then this is a sign it is too tight.
- If you have applied just enough tension then the tape will restrict the movement of your wrist up and down, just enough to protect it.